Mastering Android: A Beginner's Guide
Learn how to master Android with Tectoks' beginner's guide. Start your journey to becoming an Android expert today

Table of contents:
-
Introduction
-
Android Basics
-
Android Development Tools
-
Android Programming Fundamentals
-
Building Android Applications
-
Conclusion
1. Introduction
Do you want to learn how to create your own Android apps? If so, you've come to the correct place. In this blog post, I will teach you the basics of Android development and help you build a simple Android app by the end of the post.
Android is an open-source operating system for mobile devices that powers billions of devices around the world. Android offers a rich and diverse ecosystem of apps that cater to the various needs and preferences of users. Android also supports various features and functionalities such as sensors, cameras, GPS, Bluetooth, Wi-Fi, and more.
To develop Android apps, you need to learn some essential tools, concepts, and skills. These include:
-
The Android basics: what is an Android app, how does it work, what are its components, and how do they interact with each other?
-
The Android development tools: what are the tools that you need to set up your development environment, such as Android Studio, the official integrated development environment (IDE) for Android, and the Android Software Development Kit (SDK), which contains the libraries and tools for building Android apps?
-
The Android programming fundamentals: what are the programming languages that you can use to develop Android apps, such as Java, Kotlin, or C#, and how can you use them to write code, define variables, create classes, implement methods, use data structures, control the flow of execution, handle errors, and more?
-
The building of Android applications: how to design, develop, test, debug, and deploy your Android apps, using the Android Studio tools and the Android SDK components, such as the Android Emulator, the Android Virtual Device (AVD) Manager, the Layout Editor, the Code Editor, the Gradle build system, the Logcat, the Debugger, and more.
By the end of this blog post, you will have a solid foundation in Android development and will be able to create a simple Android app that displays a message on the screen. You will also learn how to run your app on an emulator or a real device and how to share your app with others.
Are you ready to start your Android journey? Let’s begin!
2. Android Basics
Android is a mobile operating system that is based on the Linux kernel and designed for touchscreen devices such as smartphones and tablets. Android provides a rich and diverse set of features and functionalities that enable users to enjoy various applications and services on their devices.

Some of the key features and benefits of Android are:
-
Flexibility: Android is an open-source platform that allows developers and users to customize and modify the system according to their needs and preferences. Users can choose from a wide range of devices, apps, launchers, widgets, and themes that suit their tastes and requirements. Developers can access the source code of Android and create their own versions of the operating system or applications with different features and capabilities.
-
Compatibility: Android supports a variety of hardware and software standards and protocols that enable interoperability and integration with other devices and systems. For example, Android supports Bluetooth, Wi-Fi, NFC, USB, HDMI, and other connectivity options that allow users to share data and media with other devices. Android also supports multiple languages, keyboards, input methods, and formats that cater to different regions and cultures.
-
Security: Android has a built-in security framework that protects the system and the data of the users from malicious attacks and unauthorized access. Android uses encryption, sandboxing, permissions, and other mechanisms to ensure the privacy and integrity of the users’ information and activities. Android also provides regular updates and security patches that fix any vulnerabilities and bugs in the system.
-
Performance: Android is optimized for speed and efficiency, using various techniques and tools to improve the performance and responsiveness of the system and the applications. For example, Android uses the Android Runtime (ART) to execute the applications’ code, which is faster and more memory-efficient than the previous Dalvik Virtual Machine (DVM) Android also uses the Project Treble architecture to separate the system and the vendor components, which allows faster and easier updates of the system without affecting the device-specific drivers and firmware.
The main components of Android are:
-
Linux kernel: the core of the Android system, which provides the essential functionalities of the operating system, such as memory management, process management, networking, security, and device drivers.
-
Hardware abstraction layer (HAL): a layer of libraries that abstracts the hardware-specific details and provides a standard interface for the higher-level components to access the hardware features and capabilities.
-
Android runtime (ART): A component that runs the applications’ code, using the ahead-of-time (AOT) and just-in-time (JIT) compilation techniques to optimize the execution and performance of the applications.
-
Native C/C++ libraries: a set of libraries that provide native support for various features and functionalities, such as media, graphics, databases, the web, and more.
-
Java API Framework: A set of APIs that expose the native libraries and the system services to the applications, allowing them to access and use the features and functionalities of the Android system.
-
System apps: a set of pre-installed applications on the Android system, such as the launcher, the settings, the dialer, the browser, and more.
The Android application is a package of files and resources that contains the code, the user interface, the data, and the metadata of the application. The Android application is stored in an APK file, a compressed archive that can be installed and executed on an Android device.
The main components of an Android application are:
-
Android manifest: An XML file that declares the essential information and properties of the application, such as the name, the version, the permissions, the components, the intents, and more.
-
Android resources: A set of files and folders that contain the resources of the application, such as the layouts, the drawables, the strings, the values, and more. The resources are organized and accessed using the resource IDs, which are generated by the Android system and stored in the R.java file.
-
Java/Kotlin classes: a set of files that contain the code of the application, written in Java or Kotlin programming languages. The code defines the logic, the behavior, and the functionality of the application and its components.
-
Native libraries: a set of files that contain the native code of the application, written in C or C++ programming languages. The native code can be used to access the native libraries or to perform some tasks that require high-performance or low-level access.
Android is a diverse and versatile platform that supports a variety of devices and applications.
Here are some examples of Android devices and applications that illustrate the diversity and variety of Android.
-
Samsung Galaxy S21: A flagship smartphone that runs on Android 11 and offers a premium design, powerful performance, a stunning display, and a versatile camera system
-
Google Pixel 4a: A mid-range smartphone that runs on Android 11 and offers a compact design, smooth performance, a sharp display, and a great camera system.
-
Samsung Galaxy Tab S7: A high-end tablet that runs on Android 10 and offers a sleek design, fast performance, a gorgeous display, and a stylus pen
-
Amazon Fire HD 10: A budget-friendly tablet that runs on Fire OS, a customized version of Android, and offers a durable design, decent performance, a large display, and access to Amazon services and content.
-
Fitbit Versa 3: A smartwatch that runs on Fitbit OS, a modified version of Android, and offers a stylish design, a long battery life, a bright display, and various health and fitness features
-
Fossil Gen 5: A smartwatch that runs on Wear OS, a version of Android designed for wearable devices, and offers a classic design, a smooth performance, a vivid display, and various smart and fitness features
-
Nvidia Shield TV is a streaming device that runs on Android TV, a version of Android designed for television devices, and offers a sleek design, powerful performance, a 4K HDR display, and access to various streaming services and games.
-
Xiaomi Mi Box S: A streaming device that runs on Android TV and offers a compact design, smooth performance, a 4K HDR display, and access to various streaming services and games
-
Google Nest Hub: A smart display that runs on Android Things, a version of Android designed for Internet of Things devices, and offers a simple design, responsive performance, a colorful display, and various smart and assistant features.
-
Lenovo Smart Clock: A smart display that runs on Android Things and offers a minimalist design, smooth performance, a dimmable display, and various smart and assistant features
3. Android Development Tools
-
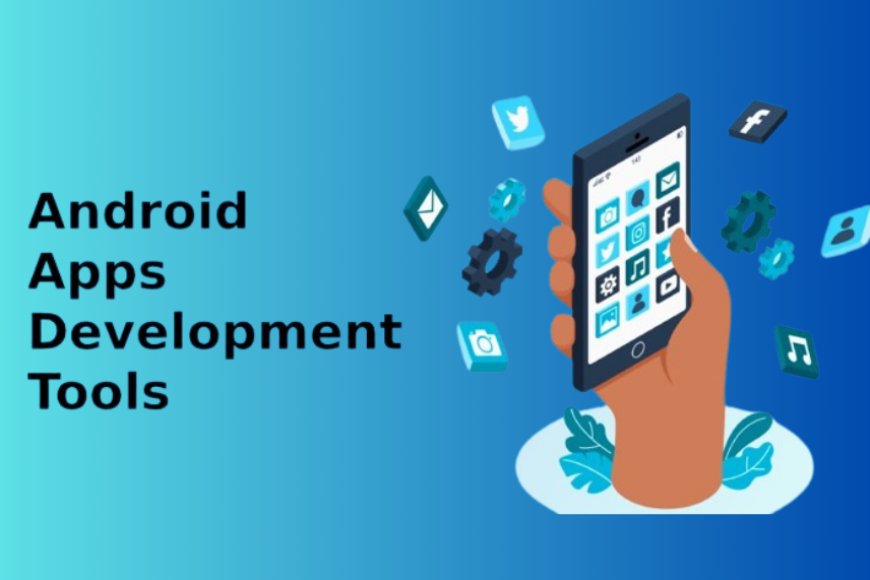
Android Studio is the official Integrated Development Environment (IDE) for developing Android applications. It is based on IntelliJ IDEA, a popular Java IDE, and provides many features to help you write, test, debug, and deploy Android apps. You can download Android Studio from here and follow the installation instructions for your operating system. You can also read the release notes to learn about the new features and improvements in Android Studio.
-
Android SDK stands for Android Software Development Kit. It is a collection of tools and libraries that you need to build Android apps. It includes the Android platform, the Android emulator, the Android Debug Bridge (ADB), and other command-line tools. You can install the Android SDK using the SDK Manager in Android Studio. You can also update the SDK components and download additional packages, such as Google Play services, Firebase, and Jetpack libraries, from the SDK Manager.
-
Android Emulator is a virtual device that simulates an Android device on your computer. You can use it to run and test your apps on different Android versions, screen sizes, and hardware configurations. You can create and manage emulator instances using the AVD Manager in Android Studio. You can also use the emulator toolbar to control the emulator behavior, such as changing the orientation, taking screenshots, recording videos, and sending fake calls and messages.
-
Android Studio Editor is the code editor in Android Studio that lets you write and edit Kotlin, Java, and C/C++ files. It provides many features to help you write better code, such as code completion, analysis, generation, refactoring, and formatting. It also supports Live Edit, which lets you see your code changes reflected immediately in the emulator or a connected device when editing Jetpack Compose.
-
Android Gradle Plugin is a plugin that integrates the Gradle build system with Android Studio. It allows you to customize your build process and generate multiple build variants for different Android devices from a single project. It also supports incremental builds, which means that only the parts of your app that have changed are rebuilt, saving you time and resources.
-
Build Analyzer is a tool that helps you analyze the performance of your builds and understand where potential build issues exist in your project. It shows you a summary of your build time, the tasks that took the longest to execute, and the warnings and errors that occurred during the build. You can access the build analyzer from the build output window in Android Studio.
-
APK Analyzer is a tool that helps you optimize your app size before publishing by inspecting the contents of your app APK file or Android App Bundle. It shows you the size of each file and resource in your app, the manifest file, the DEX files, and the native libraries. You can also compare two APKs or Android App Bundles to see how your app size changed between app versions. You can access the APK Analyzer from the Tools menu in Android Studio.
-
Tips and tricks for using Android development tools are:
-
Use keyboard shortcuts to perform common actions faster. You can view and customize the keyboard shortcuts from the Preferences or Settings menu in Android Studio. You can also use the Find Action dialog (Ctrl+Shift+A on Windows/Linux, Command+Shift+A on Mac) to search for any action by name.
-
Use plugins to extend the functionality of Android Studio. You can browse and install plugins from the Plugins Marketplace, which you can access from the Preferences or Settings menu in Android Studio. Some popular plugins are Flutter, Firebase, Kotlin, and Android Jetpack.
-
Use templates to create common app components, such as activities, fragments, services, and tests. You can access the templates from the File menu in Android Studio. You can also design your templates or alter current ones to meet your specific requirements.
-
Use the Layout Editor to design your app UI using drag-and-drop components. You can switch between the Design and Code tabs to view and edit the XML code of your layout. You can also use the Attributes panel to change the properties of the selected component and the Palette panel to add new components to your layout.
-
Use the Logcat window to view the system and app logs from the emulator or a connected device. You can filter the logs by log level, tag, or keyword and save the logs to a file. You can also use the Logcat window to enter commands for the emulator or device, such as adb shell, adb logcat, and adb devices.
This explanation helps you understand the Android development tools better.
4. Building Android Applications
Building an Android app is a rewarding and challenging process that requires you to follow some basic steps and principles.
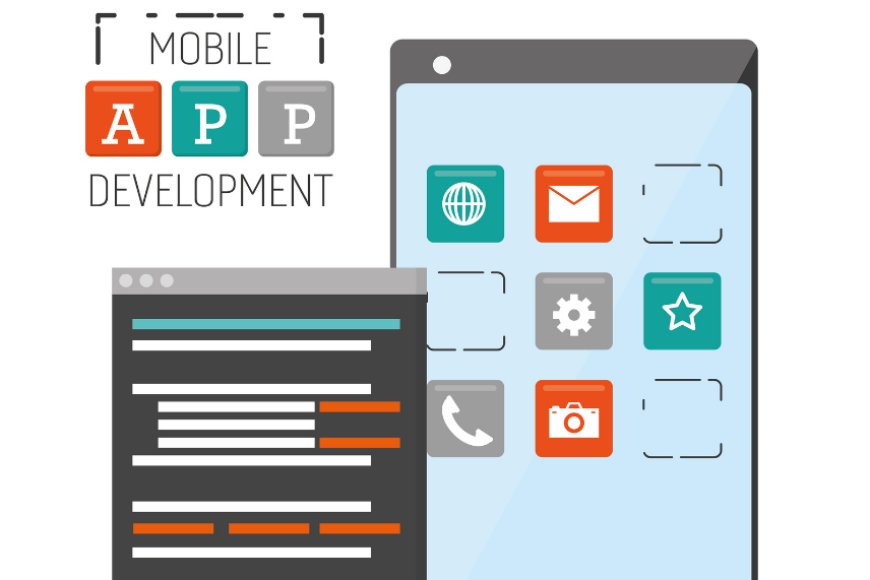
Here is a brief overview of what you need to know:
-
Defining the app idea: Before you start coding, you need to have a clear and feasible idea of what your app will do, who your target audience is, and what problem your app will solve. You can brainstorm your app idea by asking yourself some questions, such as:
-
What is the main purpose or goal of your app?
-
What features or functionalities will your app provide?
-
How will your app differentiate itself from the competition?
-
How will your app generate revenue or value?
-
What are the technical requirements and limitations of your app?
-
Designing the app layout: Once you have your app idea, you need to design the user interface (UI) of your app, which is how your app looks and feels to the users. You can use Android Studio’s Layout Editor to create your app's layout using drag-and-drop components, such as buttons, text views, images, etc. You can also use the Attributes panel to change the properties of the components, such as size, color, alignment, etc. You can switch between the Design and Code tabs to view and edit the XML code of your layout. You should follow the Android design principles and guidelines to create a consistent and intuitive UI for your app.
-
Coding the app logic: After you have your app layout, you need to code the app logic, which is how your app works and behaves to the users. Your app can be programmed in either Java or Kotlin. You can use Android Studio’s editor to write and edit your code, which provides many features to help you write better code, such as code completion, code analysis, code generation, code refactoring, etc. You can also use Live Edit to see your code changes reflected immediately in the emulator or on a connected device when editing Jetpack Compose. You should follow the Android coding best practices and standards to create a maintainable and scalable codebase for your app.
-
Testing the app functionality: Before you publish your app, you need to test your app functionality, which is how your app performs and responds to different scenarios and inputs. You can use Android Studio’s tools to test your app on different devices, such as the Android Emulator, which is a virtual device that simulates an Android device on your computer, or a physical device that you can connect to your computer via USB. You can also use the Logcat window to view the system and app logs from the device and the Debug tool window to set breakpoints, inspect variables, and step through your code. You should follow the Android testing strategies and frameworks to create effective and reliable tests for your app.
-
Publishing the app to the Google Play Store: After you test your app, you need to publish your app to the Google Play Store, which is the official app store for Android devices. You can use Android Studio’s tools to build your app for release, which generates a signed app bundle or APK file that contains your app and its resources. You can also use the APK Analyzer to inspect the contents and size of your app bundle or APK file. You need to create a developer account on the Google Play Console, where you can upload your app bundle or APK file, provide app details, such as title, description, screenshots, etc., set app pricing and distribution, such as countries, languages, etc., and submit your app for review and release. You should follow the Google Play policies and guidelines to ensure that your app meets the quality and content standards of the Google Play Store.
To learn more about building an Android app, you can follow a case study or a tutorial that shows you the process and outcome of creating a simple app that completes a certain activity or resolves a specific issue. For example, you can follow tutorial 1 to create a to-do list app that lets you add, edit, and delete tasks, or tutorial 2 to create a weather app that fetches and displays the current weather information from an API.
Building an Android app also involves some key challenges and solutions that you need to be aware of, such as:
-
Handling user input: Your app needs to handle user input, such as clicks, taps, swipes, etc., and provide feedback, such as sounds, vibrations, animations, etc. You can use Android Studio’s tools to create event listeners, which are blocks of code that execute when a user interacts with a UI component, such as a button, a text field, a list item, etc. You can also use Android Studio’s tools to create dialogs, menus, navigation, and other UI elements that facilitate user input and feedback. You should follow the Android user input and feedback guidelines to create a responsive and engaging app for your users.
-
Managing app state: Your app needs to manage app state, which is the data and information that your app needs to function and remember. You can use Android Studio’s tools to create shared preferences, which are key-value pairs that store simple data, such as user preferences, settings, etc., or databases, which are structured data that store complex data, such as user profiles, messages, etc. You can also use Android Studio’s tools to create bundles, which are collections of data that store transient data, such as UI state, user input, etc., that need to be preserved across configuration changes, such as screen orientation, language, etc. You should follow the Android app state management guidelines to create a robust and efficient app for your users.
-
Accessing device features: Your app needs to access device features, such as a camera, microphone, GPS, sensors, etc., to provide enhanced functionality and user experience. You can use Android Studio’s tools to create intents, which are messages that request an action from another app component, such as launching the camera app, opening the dialer app, etc., or permissions, which are requests that ask the user to grant access to a device feature, such as reading the contacts, accessing the location, etc. You should follow the Android device features guidelines to create a secure and compatible app for your users.
-
Using external libraries: Your app needs to use external libraries, which are reusable code modules that provide additional functionality and features for your app, such as networking, image loading, data binding, etc. You can use Android Studio’s tools to add dependencies, which are references to external libraries that you want to use in your app, to your app's build. Gradle file, which is a file that configures your app’s build process. You can also use the SDK Manager to download and update the SDK components and packages, such as Google Play services, Firebase, Jetpack libraries, etc., that you want to use in your app. You should follow the Android external libraries guidelines to create a modular and flexible app for your users.
To learn more about building Android apps, you can use some resources and references that provide more information and guidance on Android development, such as:
-
Official documentation: The official documentation is the primary source of information and reference for Android development. It covers topics such as Android basics, Android Studio, Android SDK, Android Jetpack, Android testing, Android distribution, and more. You can access the official documentation.
-
Online courses: Online courses are interactive and structured learning materials that teach you Android development from beginner to advanced levels. They include videos, quizzes, exercises, and projects that help you learn and practice Android development skills.
-
Books: Books are comprehensive and detailed learning materials that cover Android development topics and concepts in depth. They include examples, diagrams, tips, and best practices that help you understand and apply Android development knowledge.
-
Blogs: Blogs are informal and timely learning materials that share Android development news, updates, trends, and tips. They include articles, tutorials, guides, and opinions that help you stay informed and inspired about Android development.
-
Podcasts: Podcasts are audio and video learning materials that discuss Android development topics and issues with experts and guests. They include interviews, conversations, reviews, and debates that help you learn and engage with the Android development community.
5. Conclusion
Congratulations! You have completed this blog post on Android development. You have learned the Android basics, the Android development tools, the Android programming fundamentals, and the building of Android application files. You have also followed a case study or a tutorial to create a simple app that performs a specific task or solves a specific problem. You have also learned some key challenges and solutions for building an Android app, such as handling user input, managing app state, accessing device features, and using external libraries. You have also used some resources and references to learn more about Android development, such as official documentation, online courses, books, blogs, podcasts, etc.
You should be proud of yourself for your progress and achievements. You have acquired valuable skills and knowledge that will help you create amazing Android apps for yourself and others. You have also demonstrated your creativity and curiosity by exploring and experimenting with Android development. You have also shown your passion and dedication by completing this blog post and following the steps and principles of Android development.
However, your learning journey does not end here. There is still much more to learn and improve in Android development. You can always find new topics, features, libraries, and trends to explore and master. You can also always find new ways to optimize, refactor, and debug your code. You can also always find new feedback, reviews, and ratings to improve your app quality and user satisfaction. You can also always find new challenges, problems, and opportunities to solve and innovate with your app ideas and solutions.
I hope you found my blog post entertaining and useful, as well as enlightening. I also hope you had fun and learned a lot from Android development. I would love to hear your opinions, questions, or feedback on this blog post or the Android development. You can leave a comment below or contact me via email or social media. I would also love to see your own Android apps or projects that you have created or are working on. You can share them with me or the Android development community and get some feedback and recognition. Thank you for reading this blog post and happy coding!
What's Your Reaction?


