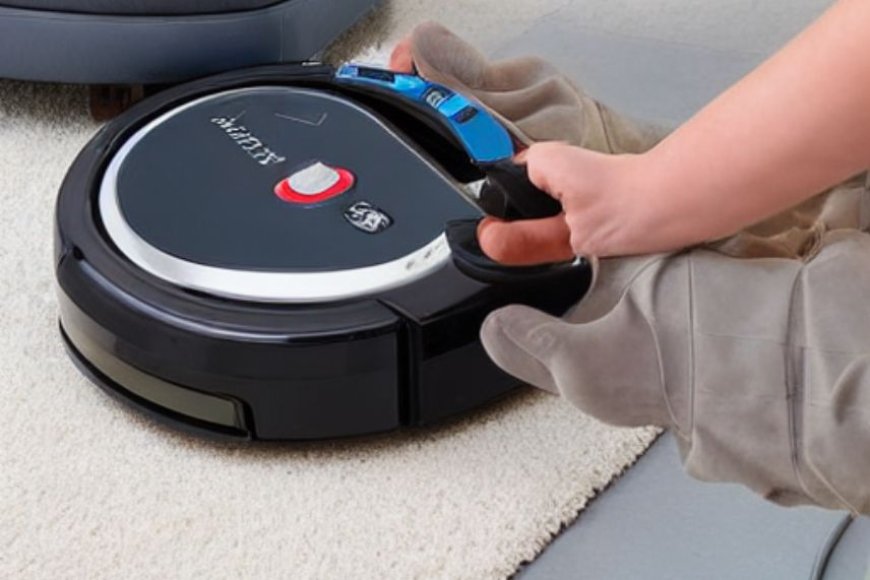
Robot Vacuum Maintenance: Tips for Optimal Performance
Keep your robot vacuum running smoothly with Tectoks! Discover expert tips for optimal performance and maintenance. Upgrade your cleaning routine today!

Table of contents:
I. Introduction
II. Cleaning Your Robot Vacuum
III. Robot Vacuum Battery
IV. Robot Vacuum Sensors
V. Robot Vacuum Brushes
VI. Robot Vacuum Maintenance
VII. Troubleshooting
VIII. Conclusion
I. Introduction
Robot vacuums are becoming more and more popular among homeowners who want to keep their floors clean without much hassle. These smart devices can navigate your home, avoid obstacles, and suck up dust, dirt, and debris with ease. However, like any other appliance, robot vacuums need regular maintenance to ensure optimal performance and longevity. In this blog post, we will share some tips on how to take care of your robot vacuum and troubleshoot some common issues.
II. Cleaning Your Robot Vacuum
One of the most important aspects of robot vacuum maintenance is keeping it clean. A dirty robot vacuum can affect its suction power, battery life, and navigation ability.
Here are some steps you should follow to clean your robot vacuum:
Empty the dustbin regularly. Depending on how often you use your robot vacuum and how much dirt it collects, you should empty the dustbin after every use or at least once a week. To do this, simply detach the dustbin from the robot vacuum, open the lid, and dump the contents into a trash can. You can also use a brush or a cloth to wipe off any dust or debris that may be stuck inside the dustbin.
Clean brush rollers and filters. The brush rollers are the parts that agitate the dirt and debris on the floor and direct them to the suction inlet. The filters are the parts that trap the dust and allergens from the air and prevent them from escaping the dustbin. Both of these components need to be cleaned regularly to avoid clogging and reduce wear and tear. To clean the brush rollers, you need to remove them from the robot vacuum, cut off any hair or fibers that may be tangled around them, and use a brush or a cloth to remove any dirt or dust. To clean the filters, you need to remove them from the dustbin, tap them gently to shake off any loose dust and use a brush or cloth to remove any stubborn dirt. You should also replace the filters every few months or according to the manufacturer's instructions.
III. Robot Vacuum Battery
Another important aspect of robot vacuum maintenance is taking care of the battery. The battery is the power source of your robot vacuum and determines how long it can run and how well it can perform.
Here are some tips on how to maintain your robot vacuum battery:
proper charging habits. To prolong the battery life of your robot vacuum, you should follow some proper charging habits. First, you should always use the original charger and docking station that came with your robot vacuum. Second, you should avoid overcharging or undercharging your robot vacuum. Overcharging can cause the battery to overheat and degrade faster, while undercharging can cause the battery to lose its capacity and efficiency. To avoid these problems, you should let your robot vacuum return to its docking station automatically when it is low on battery or when it finishes its cleaning cycle. You should also avoid interrupting the charging process or unplugging the charger before the battery is fully charged. Third, you should store your robot vacuum in a cool and dry place, away from direct sunlight, heat sources, and moisture. Extreme temperatures and humidity can damage the battery and affect its performance.
Understanding and maintaining battery types. Different robot vacuums may have different types of batteries, such as lithium-ion, nickel-metal hydride, or nickel-cadmium. Each type of battery has its own advantages and disadvantages and requires different maintenance methods. For example, lithium-ion batteries are the most common and efficient type of batteries for robot vacuums, but they are also the most expensive and sensitive to overcharging and overheating. Nickel-metal hydride batteries are cheaper and more durable than lithium-ion batteries, but they have lower capacity and suffer from memory effects, which means they lose their ability to hold a full charge over time. Nickel-cadmium batteries are the oldest and cheapest type of batteries for robot vacuums, but they have the lowest capacity and the highest environmental impact, as they contain toxic metals that can leak and pollute the soil and water. To maintain your robot vacuum battery, you should know what type of battery it has and follow the specific instructions from the manufacturer.
IV. Robot Vacuum Sensors
Another crucial aspect of robotic vacuum maintenance is keeping the sensors clean and calibrated. The sensors are the eyes and ears of your robot vacuum, as they help it detect obstacles, cliffs, walls, and dirt. If the sensors are dirty or malfunctioning, your robot vacuum may bump into furniture, fall off stairs, get stuck, or miss spots.
Here are some tips on how to maintain your robot's vacuum sensors:
keeping sensors obstruction-free. To keep the sensors working properly, you should make sure they are free of any dust, dirt, debris, or scratches that may interfere with their signals. You can use a soft cloth, a cotton swab, or a compressed air can to gently wipe or blow away any dirt or dust from the sensors. You should also avoid touching the sensors with your fingers, as the oils from your skin may leave a residue that can affect the sensors' sensitivity.
calibration and troubleshooting tips. To calibrate the sensors, you should follow the instructions from the manufacturer, which may vary depending on the model and type of sensors. Some common calibration methods include placing the robot vacuum on a flat and level surface, pressing a specific button or combination of buttons, or using a remote control or an app to initiate the calibration process. If the sensors are still not working properly after cleaning and calibrating them, you may need to troubleshoot them by checking the wiring, the connections, or the software. You may also need to contact customer service or the repair center for further assistance.
V. Robot Vacuum Brushes
Another essential aspect of robot vacuum maintenance is inspecting and cleaning the brushes. The brushes are the parts that sweep the dirt and debris from the floor and direct them to the suction inlet. If the brushes are worn out, damaged, or dirty, they may not be able to clean the floor effectively or efficiently.
Here are some tips on how to maintain your robot vacuum brushes:
Regular inspection and cleaning. To inspect the brushes, you should remove them from the robot vacuum and check for any signs of wear and tear, such as cracks, splits, or fraying. You should also check for any hair, fibers, or debris that may be tangled around the brushes and affect their rotation. To clean the brushes, you should use a brush or scissors to cut off any hair or fibers and use a cloth or a compressed air can to remove any dirt or dust. You should also wash the brushes with warm water and mild soap every few months or according to the manufacturer's instructions, and let them dry completely before reinstalling them.
Knowing when to replace brushes. To replace the brushes, you should follow the instructions from the manufacturer, which may vary depending on the model and type of brushes. Some common replacement methods include unscrewing, snapping, or sliding the brushes out of the robot vacuum and inserting the new brushes in the same way. You should also dispose of the old brushes properly, as they may contain plastic or metal parts that are not biodegradable. You should replace the brushes every year according to the manufacturer's recommendations or whenever you notice a significant decrease in the cleaning performance of your robot vacuum.
VI. Robot Vacuum Maintenance Schedule
To make robot vacuum maintenance easier and more effective, you should create a simple schedule that reminds you of the tasks you need to do and the frequency with which you need to do them.
Here is a possible schedule that you can follow or modify according to your needs and preferences:
Quick daily checks. Every day, you should check the dustbin, the brush rollers, and the filters, and clean them if necessary. You should also check the battery level and the charging status of your robot vacuum and make sure it is properly docked and charged. You should also check the sensors and the brushes and wipe off any dirt or dust that may have accumulated on them.
Weekly tasks. Every week, you should empty the dustbin, clean the brush rollers and the filters, and wash the brushes with water and soap. You should also calibrate the sensors and troubleshoot any issues that may arise.
Monthly tasks. Every month, you should replace the filters and inspect the brushes for signs of wear and tear. You should also check the wiring, the connections, and the software of your robot vacuum and update them if necessary.
Yearly tasks. Every year, you should replace the brushes and the battery, and contact customer service or the repair center for any major repairs or replacements.
VII. Troubleshooting
Even with regular maintenance, your robot vacuum may encounter some problems that affect its performance or functionality.
Here are some common issues that you may face and how to deal with them:
Suction and navigation issues. If your robot vacuum has low suction power or poor navigation ability, you should check the dustbin, the brush rollers, the filters, and the sensors, and clean or replace them if needed. You should also check the floor type and the cleaning mode and adjust them accordingly. For example, if your robot vacuum is cleaning a carpeted floor, you may need to increase the suction power or switch to carpet mode. If your robot vacuum is cleaning a hard floor, you may need to decrease the suction power or switch to a hard floor mode. You should also check the cleaning pattern and the boundary markers, and make sure they are suitable for your home layout and your cleaning preferences. For example, if your robot vacuum is cleaning in a random pattern, you may need to change it to a systematic or spiral pattern. If your robot vacuum is crossing the boundary markers, you may need to reposition them or use a virtual wall or an Okay, let me continue with the blog post.
Connectivity and software issues. If your robot vacuum has connectivity or software issues, such as losing a Wi-Fi connection, failing to sync with your app, or displaying error codes, you should check the network settings, the app settings, and the robot vacuum settings, and make sure they are compatible and updated. You should also restart your robot vacuum, your router, and your app, and try to reconnect them. If the problem persists, you may need to reset your robot vacuum, your router, or your app and follow the setup instructions again. You may also need to contact customer service or the repair center for further assistance.
VIII. Conclusion
Robot vacuums are incredible machines that can simplify your life and keep your home cleaner. However, they also need regular maintenance to ensure optimal performance and longevity. By following the tips we provide in this blog post, you can take care of your robot vacuum and troubleshoot some common issues. We hope you found this blog post helpful and informative, and we encourage you to follow our robot vacuum maintenance blog and enjoy the benefits of your smart device.
What's Your Reaction?


